How to Clean and Sanitize Your Bottled Water Cooler
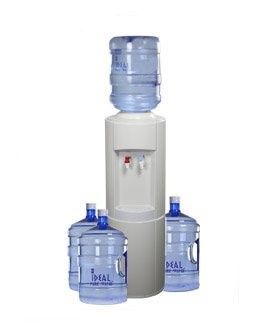
Your bottled water cooler also requires occasional cleaning and sanitizing. Learn how to clean and sanitize your bottled water cooler here.
Pandemic or not, there has always been a need for you to clean and sanitize the water coolers in your office or place of business. Doing so ensures that there isn't a spread of sickness, germs, or anything else unwanted in the workplace.
However, not many companies take the time to do this effectively. They use the same water cooler for years without actually properly cleaning it. The worst-case scenario is that your staff could become seriously ill. It may also simply result more sick days and loss of energy for those who drink from the cooler.
See below for an in-depth guide on how to clean and sanitize your bottled water cooler.
1. Stock Up on Supplies
Before you start taking the time (half an hour, at most) to clean your bottled water cooler, be sure to stock up on everything that you will need for the project.
First, you will need tight-fitting rubber gloves to ensure your hand fits in tight spaces. You'll also need a clean microfiber cloth to clean out the insides of the cooler and ensure all germs are wiped from the surface.
Make sure you also have a bucket ready that can hold a few gallons of water, as well as a viable cleaning solution. We highly recommend using Pristines H2OK water cooler cleaner, which is only $12.95 on our site.
If your cooler produces hot and cold water, you will need something to plug up your hot and cold cooler. If your cooler produces only cold and room temperature water, then a plug isn’t necessary.
Important note: if you're cleaning multiple bottled water coolers at once, make sure to have a bucket for each one, as well as a different microfiber cloth.
2. Remove All Current Water
First things first, to thoroughly clean and sanitize your water dispenser, you'll need to remove all of the current water from it and start fresh.
Start by unplugging your cooler. This will also ensure your safety so that you don't accidentally shock yourself (or worse) while sanitizing the cooler and all of its inner workings.
Once you've unplugged the cooler, remove the empty water bottle from the top. If the water bottle isn't empty, either wait for it to be used up or pour out the rest of it into a different container.
After the water bottle is removed, drain all of the remaining water that might be sitting in the cold and room temperature taps.
Before moving on to the next step, check to see if your bottled water cooler has a no-spill attachment at the top of the water cooler's baffle. If it does, you'll want to remove it. Otherwise, your cleaning solution won't have a way out.
Once the water is completely out of the tank, give it a once-over with your microfiber cloth to sweep up the germs and bacteria that might be festering inside. It's better to be safe than sorry!
3. Pour, Mix, and Wait
Once the bottled water cooler is void of all water in the taps and the no-spill attachment has been removed, you're cleared to pour your H2OK water cooler cleaning solution inside the cooler's tank.
After the cleaning solution is completely emptied, fill the rest of the tank with drinking water to mix it in with the solution. Set a timer for 15 minutes before moving on to the next step.
If you're cleaning multiple bottled water coolers at once, make sure that you have an H2OK cleaning solution for each.
Set a different timer for each water cooler after you've mixed in the solution with drinking water. As soon as the timer hits 15 minutes, you will want to perform the next step.
4. Drain the Taps
Once the 15 minutes have passed, it's time to drain the water tank (AKA the water reservoir) by opening both the cold and room temperature taps. If you have a hot and cold cooler, do not drain the hot water.
After the water has been drained, you'll want to wash it one more time through by filling the reservoir with clean water and—once again—drain it from the cold and room temperature taps.
Once that's done place the no-spill attachment back on top of the water cooler's baffle. After that, you can place the brand-new water bottle on top of the water cooler.
If you're in need of new water bottles for your cooler or are looking for a new provider, be sure to reach out to inquire about our water delivery service.
5. Fill Two Full Cups
You'll want to take one final step in order to assure that your water is completely clean and safe for you and your staff/clients to drink.
Drain two full cups worth of water from both the cold and room temperature tap, then toss that water out. This is a last-ditch measure to ensure that the cleaning solution is gone and the water is fresh to drink.
Once you've done that, congratulations! Your water is now completely clean and ready to be tasted by all that need hydration on your work floor.
Take Each Step Seriously
This method will ensure a clean and sanitary water cooler, but only if it’s done properly. It's important that you not skip any of the steps.
For more information on the type of water you might want for your office, be sure to read this page about the different water types that we offer and how each is different.
For more inquiries, call us today at: (402) 392-2600, and we will be happy to assist you further.
